Embroidery in Sewing Projects: Wall Pocket Organiser
Every seamstress has to care about framing after finishing her works. There are plenty of them in the drawers, eager to show themselves to the world, found their receptive audience! Every master wants to get a decent feedback. Of course, you can take your embroidery to a framing workshop with a reasonable amount of your money. But you can do it yourself at home. It is more efficient and available even for beginners. Follow our master class with detailed step by step photos and explanations and you will learn how to frame your embroidery in a passepartout.
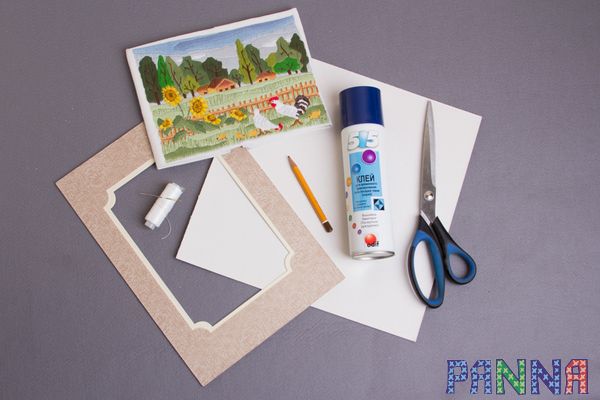
You need:
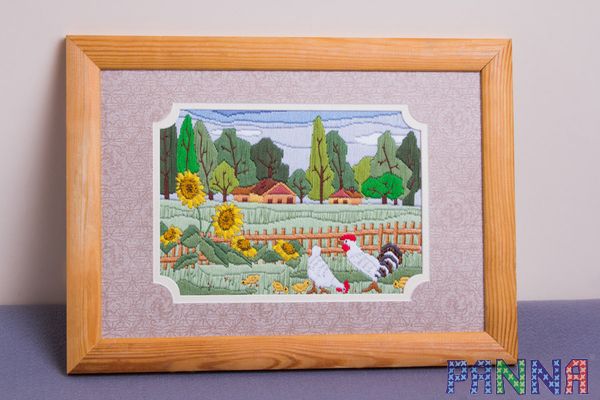
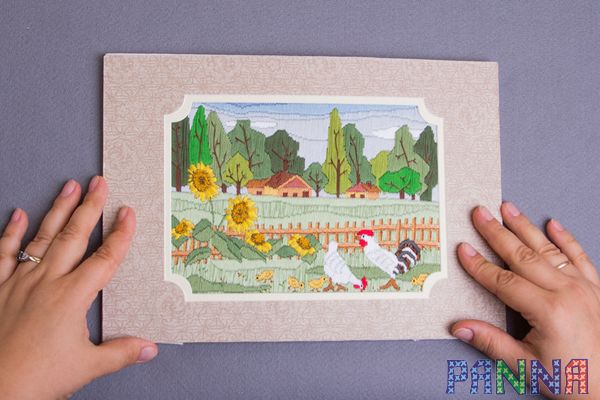
1. Finished embroidery, PANNA Art.: PS-1641 “Summer in the Village”
2. Single passepartout, GAMMA Art.: PCP 15 х 21 cm 121/2036
3. Temporary fabric adhesive spray, Art.: 505 “ODIF” (250 ml)
4. Nylon shoe sewing thread, Art.: 9K
5. Frame of the suitable size
5. Scrapbooking cardboard sheets (white)
6. Needles, GAMMA Art.: N-311 (No. 1-5)
7. Pearl head pins, GAMMA Art.: PH-010
8. Scissors, GAMMA Art.: U-9016
9. Pencil
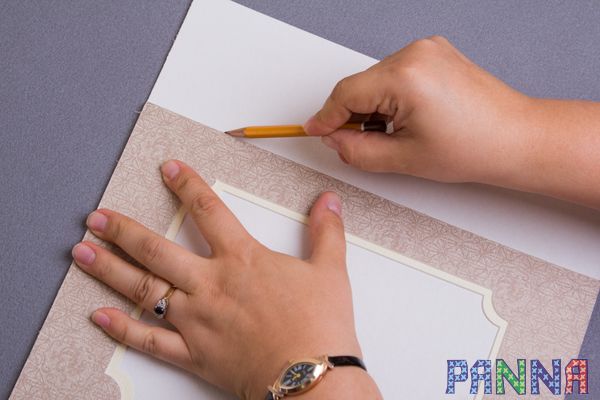
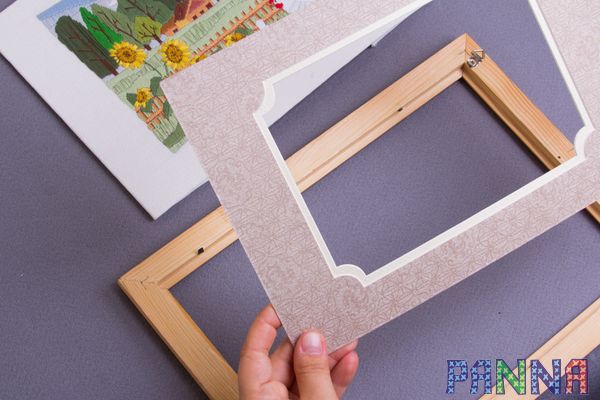
1. Put the passepartout on the white cardboard. Draw a line along the outer border of the passepartout. Cut an extra piece of the cardboard along the line.
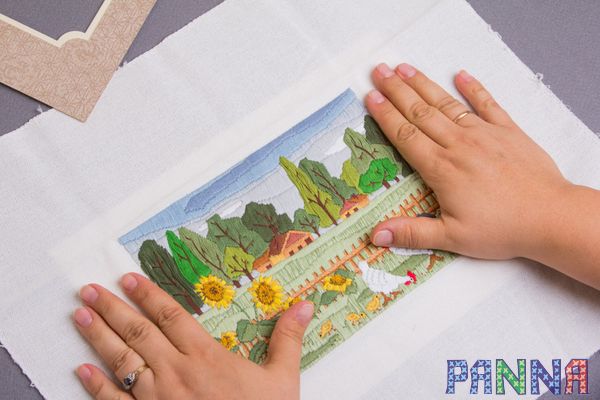
2. Put the white cardboard under the finished embroidery “Summer in the Village”. Put the passepartout on the embroidery. Align the edges of the cardboard backing and the passepartout. Align the embroidery in the passepartout window and find the most appropriate location for it.

3. Put the passepartout aside. Avoiding relocation of the embroidery press it to the cardboard, fold the part of it and spray the temporary fabric adhesive on the wrong side.

4. Press the embroidery with the adhesive on it firmly to the cardboard backing to keep it in place.
5.Put the embroidery with the cardboard face down. Tuck the wide and the narrow sides of the embroidery to the cardboard and press the folds.
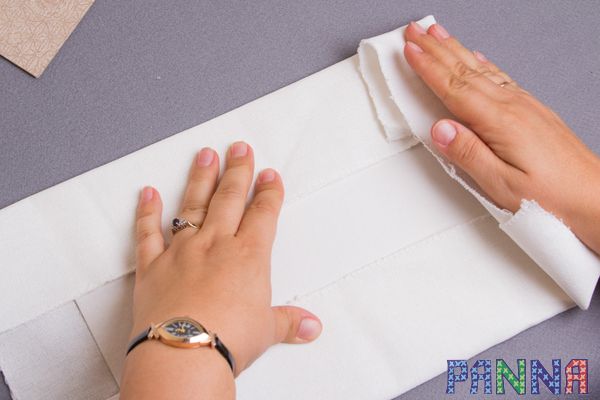
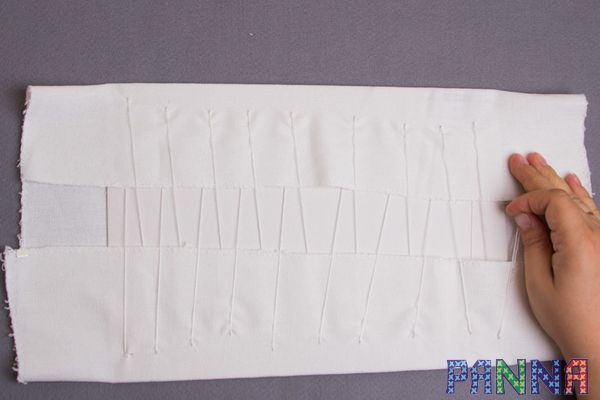
6. Pin the fabric to the edge of the cardboard pulling the fabric tightly to fix it properly.
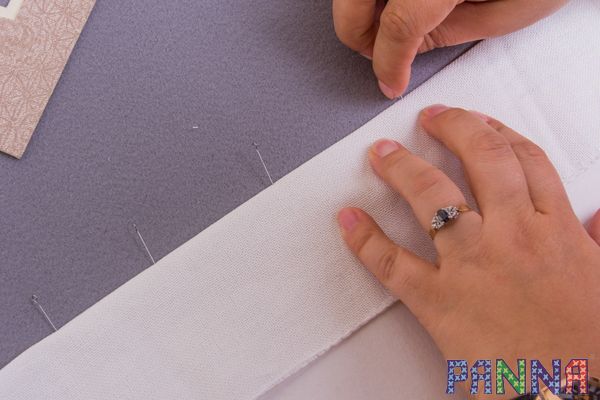
7. Thread a needle with a very long piece of the nylon shoe sewing thread. Pierce the needle through the fabric and secure the thread.
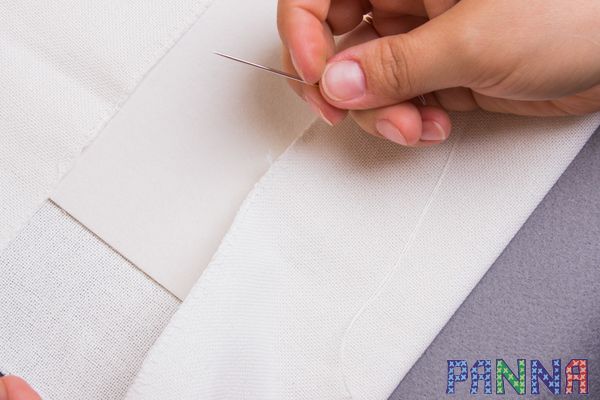
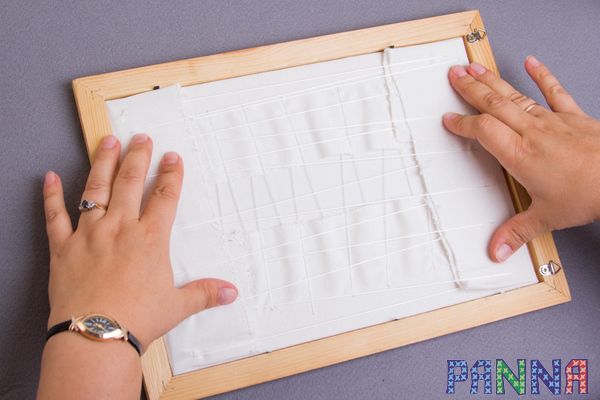
8. Lace the fabric to the back of the cardboard. It is better to lace the wide sides of the embroidery first. Stitch both edges of the fabric with long stitches pulling the edges tightly to each other with the free hand.
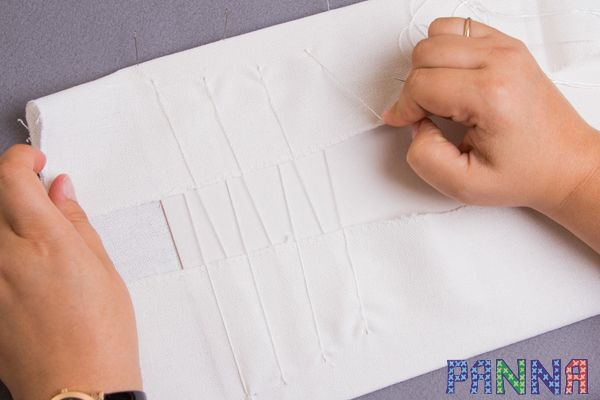
9. Continue lacing up to the end of the fabric.
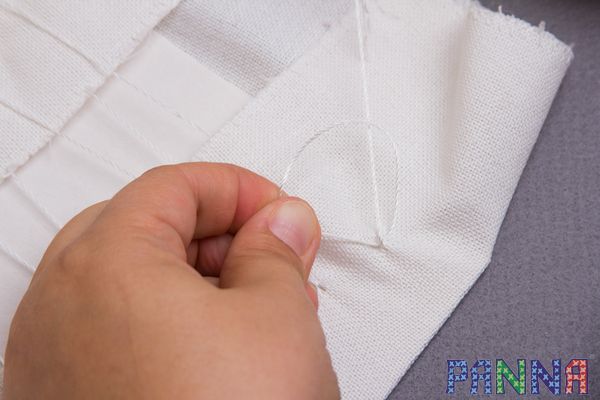
10. Secure the thread on the fabric.
11. Thread the needle with the long piece of the thread again and stitch together in the same way the narrow sides of the embroidery. Pull the stitches tightly.
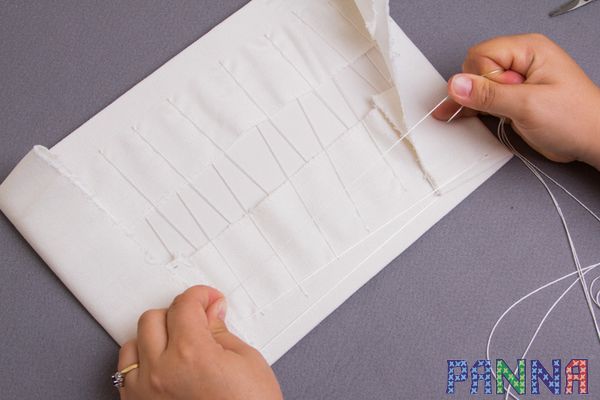
12. Continue lacing up to the end of the fabric and secure the thread.
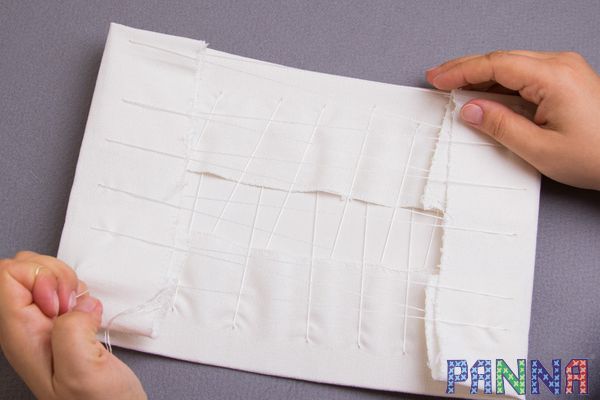
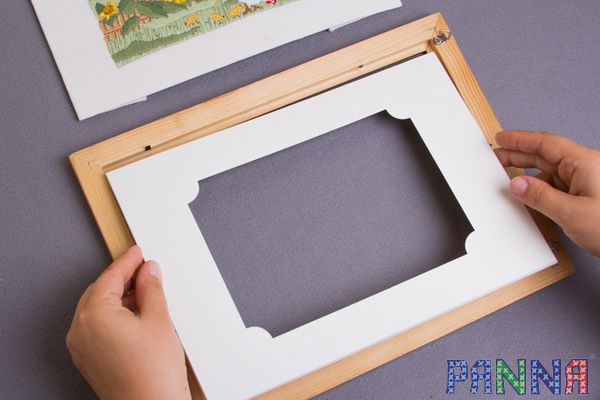
13. Put the passepartout on the tightly pulled embroidery again. Make sure that the location of the picture within the passepartout is appropriate. At this step you can remove the stitches and adjust the embroidery in the passepartout window.
14. Put the passe-partout face down into the frame.
15. Spray the temporary fabric adhesive on the white margins around the embroidery.
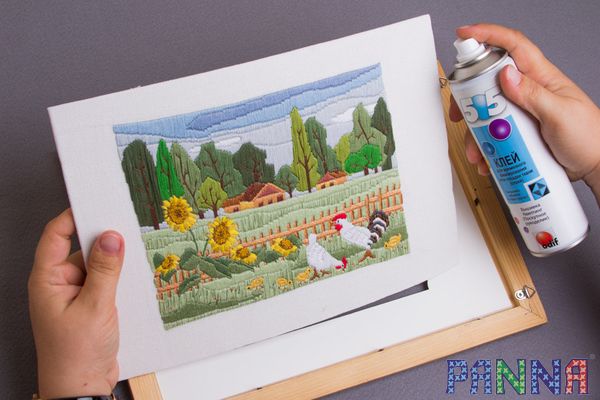
16. Turn the embroidery face down and press it firmly to the passe-partout.
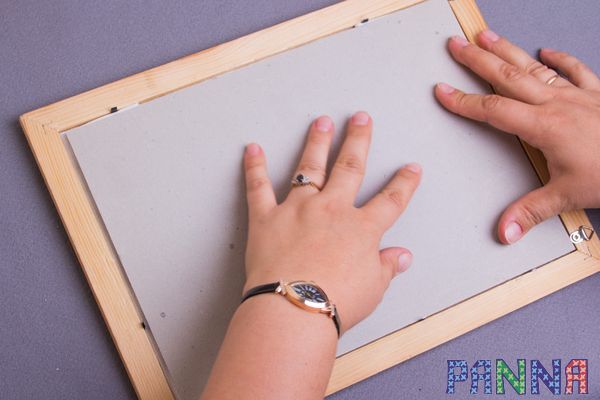
17. Put on the embroidery the frame cardboard backing and turn the metal holders to fix it.
18. Now your embroidery has acquired a finished look and become a real work of art. Find it a worthy place in the interior of your house!