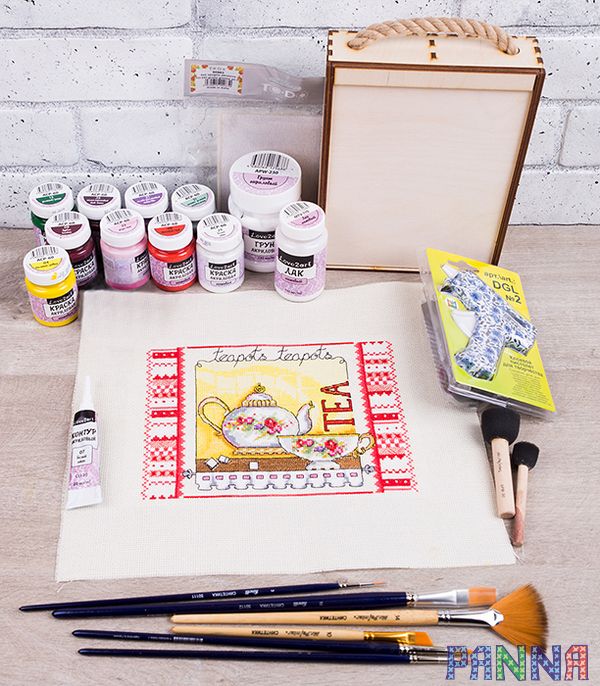
Creative Ways to Use Embroidery: Sliding Lid Box
Finished embroidery usually becomes a framed picture. You can do more than simply hang it on a wall! Decorate a box with your embroidery and you result in a beautiful and also functional object. Follow our tutorial with step by step photos and detailed explanations to make an embroidered sliding lid box. This will turn an ordinary wooden box into a colourful, enchanting trinket casket for tiny needlework accessories or tea bags.
1. Finished embroidery PANNA «Exquisite Porcelain» КТ-1813
2. Adhesive interlining
3. Unfinished plywood box
4. Hairdryer
5. Sandpaper sponge (coarse)
6. Glue gun
7. Acrylic primer
8. Acrylic paints (matte)
9. Contour acrylic paste
10. Water-based varnish for decoupage (matte)
11. Flat brush (synthetic)
12. Flat bevel brush (synthetic)
13. Fan brush (synthetic)
14. Round brush (synthetic)
15. Sponges
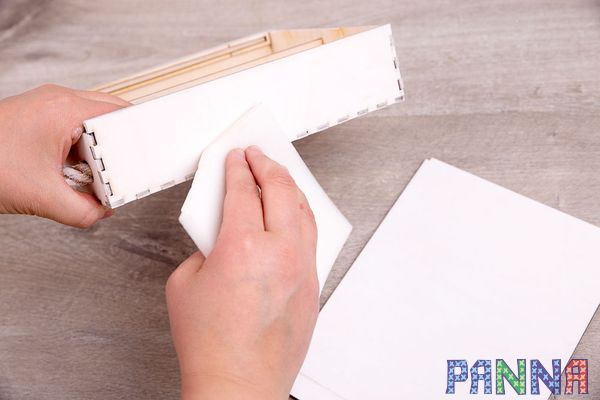
If the surfaces of the plywood box you’re using is a little rough, give them a quick sand before you start priming and decoration. Just a little hack: wet the plywood of the box with water and dry it with a hairdryer. Wooden fibers will rise, and then you can sand it quickly and accurately. It is better to use the sandpaper sponge. Try to sand along the fiber, then the surface will become smooth and silky.

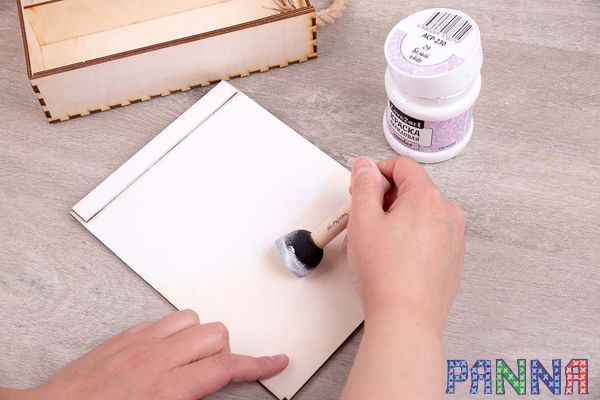
1. Give your box a coat of primer to prepare it for painting and decoration. Apply the primer with the sponge to spread it quickly and evenly. Allow the primer to dry for two hours. Then sand it once more with the sandpaper sponge until the surface will become totally smooth.
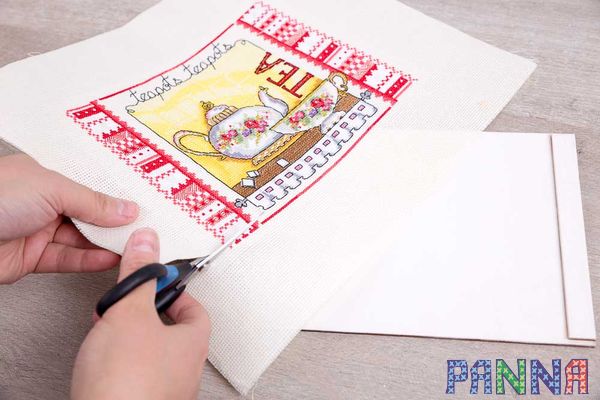
2. Cut off the loose edges of the PANNA finished embroidery canvas exactly the size of the lid. Strengthen your embroidery at first: apply the adhesive interlining and iron.
3. Fix the embroidery with the help of the glue gun. Warm up the gun for five minutes. Then apply the glue around the perimeter of the embroidery and press it to the lid. You must work quickly before the glue gets too cool!

4. Outline the large squares on the sides and the bottom of the box. Choose 3 or 4 colours of the acrylic paints (matte) that will fit your embroidery. You can take classic colors: red, white, cool yellow. Or you can maintain the colours of the teapot and take pink, purple, yellow and blue.
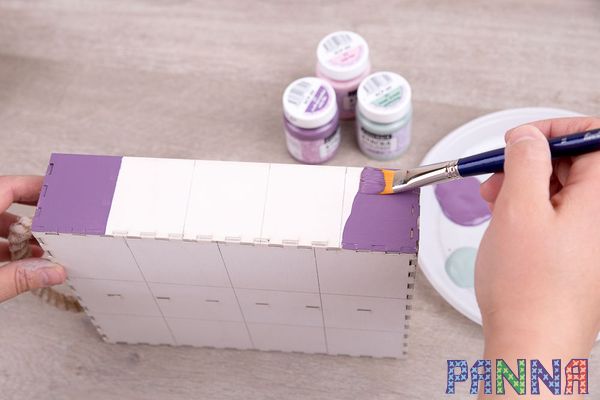
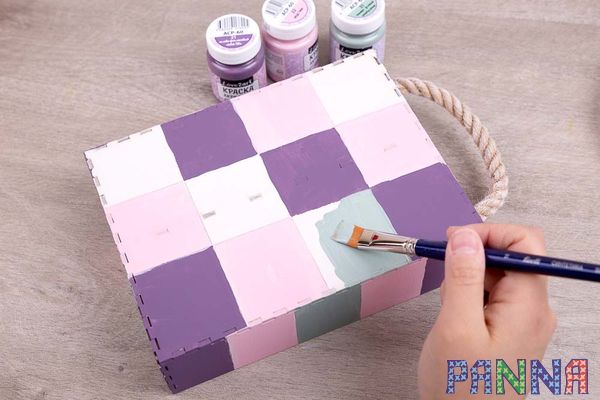
5. Paint the squares with the selected colors. Keep the same color squares apart. Use the synthetic flat brush: it is elastic enough for an acrylic paint, but not as hard as natural brushes.
6. Use the handle of the brush to make polka dots (single or in groups of three). They will freshen up your work greatly.

7. For large circles use the handle of the sponge.
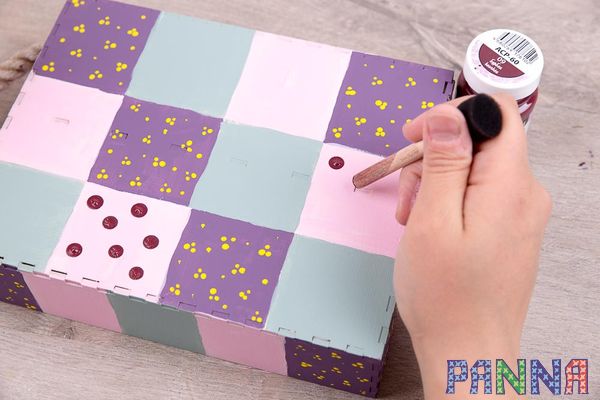
8. Allow the paint to dry and then fill in the large circles with the dots.

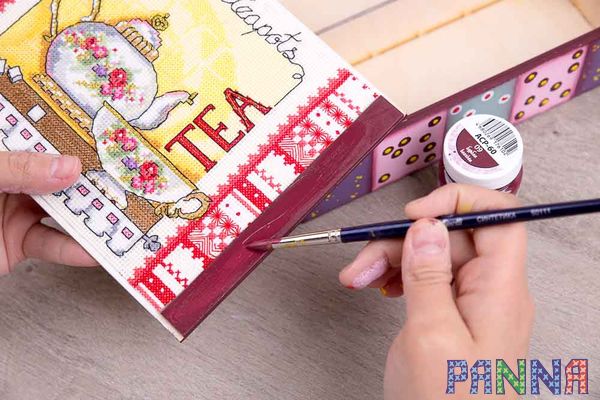
9. Outline the perimeter of the squares with the dark red acrylic paint to create a 3D effect. Use the flat bevel brush.

10. Paint the trim on the lid with the dark red. Use the round brush. Allow the paint to dry.
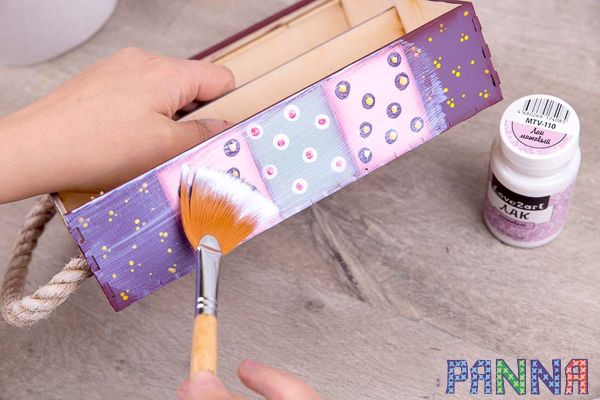
11. Coat the painted surfaces of the box with the water-based varnish (matte). Use the fan brush, it holds a lot of varnish and produces an even layer. Allow the first layer of the varnish to dry for an hour and then apply the second.
12. Use the contour acrylic paste for the embroidered edge pattern. Try to apply the dots of the same size at the same distance from each other for the beautiful and neat pattern. Allow the pattern to dry without using a hairdryer.

13. Leave the contour paste pattern on the lid to dry and paint the inner surface of your box. Use the flat brush. You can choose the bright yellow paint to maintain the background on the embroidery (see the picture below) or take one of the colours you selected before. Allow the paint to dry completely.

Your sliding lid box is ready!